Saturday, December 18, 2010

Nutter Butter Bombs!


The Oreo Bombs were so yummy. My hubs told me I should use the same recipe but use Nutter Butters instead. The man must have been inspired! They turned out GREAT! I can't decide which one I prefer. To do so, would be like picking a favorite child. No can do!

Ingredients:
1 pkg. Nutter Butter cookies, crushed. (If you have a food processor, then I guess that would work fine. I don't, so I just grab a stack of about 5 cookies and break them by hand. Later, I'll use a pastry blender to crush them further, if I think it's needed)
8 oz. softened cream cheese
1 pkg. milk chocolate chips
about 1/3 to 1/2 cup peanut butter chips

In a mixing bowl (I use my kitchen aid for this) mix the crushed Nutter Butters and cream cheese till well blended.
Form into balls, about walnut sized, and place on a cookie sheet lined with waxed paper, making sure they don't touch.
Put this in the freezer for about 20 minutes. This will make them easier to handle when dipping in the chocolate.
After 20 minutes, take out of freezer and set aside.
In a microwave safe bowl, melt the milk chocolate chips, just until melted. Stir till smooth.
Drop each Nutter Butter Bomb into the milk chocolate and using toothpicks, turn to coat well and place back on lined cookie sheet.
When all have been coated, place in fridge while you melt the peanut butter chips in a small bowl.
Remove the Nutter Butter Bombs from the fridge and using a fork, drizzle with the melted peanut butter chips.
Store in fridge till ready to serve.

Makes a little over 2 dozen.
Oreo Bombs!


Super easy and less than 5 ingredients! These taste just as awesome as their name! The only complaint I ever have, is that I didn't bring enough!

Ingredients:
1 pkg. Oreo cookies, crushed. (If you have a food processor, then I guess that would work fine. I don't, so I just grab a stack of about 5 cookies and break them by hand. Later, I'll use a pastry blender to crush them further, if I think it's needed)
8 oz. softened cream cheese
1 pkg. milk chocolate chips
about 1/3 to 1/2 cup white chocolate chips

In a mixing bowl (I use my kitchen aid for this) mix the crushed Oreos and cream cheese till well blended.
Form into balls, about walnut sized, and place on a cookie sheet lined with waxed paper, making sure they don't touch.
Put this in the freezer for about 20 minutes. This will make them easier to handle when dipping in the chocolate.
After 20 minutes, take out of freezer and set aside.
In a microwave safe bowl, melt the milk chocolate chips, just until melted. Stir till smooth.
Drop each Oreo Bomb into the milk chocolate and using toothpicks, turn to coat well and place back on lined cookie sheet.
When all have been coated, place in fridge while you melt the white chocolate chips in a small bowl.
Remove the Oreo Bombs from the fridge and using a fork, drizzle with the melted white chocolate.
Store in fridge till ready to serve.

Makes a little over 2 dozen.

Wednesday, December 15, 2010

Joyous Wassail!

This recipe makes up a TON, so it is most ideal for holiday parties. The first time I made this, I wasn't sure how people would like it, so I also made up a huge pot of homemade hot chocolate. Delicious as the hot chocolate was, it was no match for the wassail. I found myself trying to push the hot chocolate, while a path was being worn to were the wassail was! Enjoy, my friends!

Ingredients:
1 gallon apple cider
1 quart orange juice
1 cup lemon juice
1 large can pineapple juice
24 whole cloves
1 cup sugar
4 sticks cinnamon

Combine all ingredients in a large pot. Simmer at least 10 minutes. Remove cinnamon sticks and cloves. Serve hot. Makes a gallon and a half. Store in fridge when cool. Shake and heat desired amount to be served.

Monday, December 13, 2010

7 Layer Salad AKA Company Salad

This recipe was given to me by my Aunt Cynthia. My Aunt Cynthia has a talent for giving the perfect hug! From as far back as I can remember until today, when I see my Aunt Cynthia, I HAVE to have one of her hugs! She doesn't give you one of those barely there hugs. And she doesn't try her hand a chiropractic work on your neck while giving you a hug either. It's the kind of hug that lets you know you've been hugged and makes you feel like YOU matter! Now THAT'S a hug! Oh and she makes a mean salad too!

First, you're going to layer in a 9 X 13 in. dish in order:
1 head lettuce shredded
1/2 cup green onions, chopped
1 cup celery, diced
1 can sliced water chestnuts,drained and chopped
1 reg. pkg. frozen peas
Next, you're going to make the dressing as follows:
Combine 2 cups mayonnaise, 2 tsp. sugar, 1/2 tsp garlic powder & 1 tsp. Lawry's season salt. Drop by dollops on top of the peas and spread. Cover with plastic wrap and refrigerate 24 hours.(Note: I've made it when I've only had time to refrigerate it for 10 hours and it seemed fine to me.)
Before serving, add your final layers as follows:
1 cup grated cheddar cheese
4 hard boiled eggs, chopped
1 bottle of bacon bits
3 chopped tomatoes (I leave this out since I don't care for tomatoes)

ENJOY!!

Monday, November 22, 2010

Grandma York's Pumpkin Pie Squares!


This is a nice change from the same old pumpkin pie served every holiday season. Don't get me wrong now. I'm not a pumpkin pie hater. I LOVE pumpkin pie! In fact, I pretty much love ALL desserts pumpkin!

I was first introduced to pumpkin pie squares when I was about 13 years old. My Grandma York had a new recipe she wanted to try out that year as one of the Thanksgiving desserts (mainly for the kids, because you get nearly twice as many servings from a dish of this as you do from one pumpkin pie). I distinctly remember certain grownups looking at the new dessert and then looking at us kids. Granted, I was just a kid, but I'm pretty sure it was look of pity and justification. "Poor kids. They won't be getting any of Grandma's pumpkin pie this year. Then again, they are JUST kids and probably wouldn't appreciate it anyhow. Yes, this pumpkin squares thing will be fine for them." Now make no mistake. I don't recall anyone actually saying these words to me. But you'd be astounded as to what comes across in a look from a grownup when your a kid. No matter though. Grandma served me up a pumpkin pie square with a dollop of cool whip and after taking my first bite, I KNEW who had the better deal THAT Thanksgiving Day! The adults also realized how delicious they were. I'm thinking this was due in part to hearing us grandkids rave about it!

Years later, when I was about to get married, my aunts threw me a bridal shower. At this shower, each guest brought along with their gift a spice with a recipe attached. This is a great idea that I have used at every bridal shower I have been involved in planning and is always greatly appreciated and fun. Go take a look in your own spice cabinet or rack and think of how much money you have invested in all of your spices there. Quite a chunk of change, right? So it's nice for a brand new bride and groom to have a little more than filled salt and pepper shakers to season their foods when they first get married. Plus, you've already started your own collection of recipes. One of my most favorites is the pumpkin pie squares recipe from Grandma York. I've used it so much that it's bent, creased and kitchen stained. I have it copied on another card, but I feel closer to my Grandma, who passed away a few years ago, when I pull it out, rest it on the counter and begin my baking. It has a hole punched in the side where she ran the ribbon through to tie on the little plastic jar of pumpkin pie spice. This reminds me of my own bridal shower and how much my aunts loved me to think of something so sweet and helpful. When I flip it over to read the directions on how to make it, my eye is immediately drawn to the bottom. There, I read three of the most touching words. Love Grandma York. My heart and my eyes both feel warm and I say softly, "I love you too, my Grandma York. Now let's do some baking."

Ingredients:

Crust:
1 pkg. yellow cake mix (set aside 1 cup of the dry cake mix for topping)
1/2 cup softened margarine or butter
1 egg

Filling:
2 cups (1 15 oz. can) canned pumpkin (NOT pumpkin pie filling)
3/4 cup brown sugar
1 tsp. pumpkin pie spice
1/4 tsp. salt
2 eggs
3/4 cup evaporated milk
1 tsp. vanilla

Topping:
1 cup reserved yellow cake mix
1/4 cups softened margarine or butter
1 tsp. cinnamon

Directions:

Preheat oven to 350 degrees. Grease bottom only of a 9 X 13 in. pan, either with shortening or cooking spray. Mix ingredients for crust and press evenly into the bottom of the pan. If it gets a little too sticky to handle, just dip your hands in cold water, shake them off and go back to pressing. Or you can use waxed paper if you wish. Mix the ingredients for the filling until blended and pour evenly over crust. Using a pastry blender, mix the ingredients for the crumb topping and spread evenly over the filling. Bake at 350 for 1 hour. Cool completely, cut into squares and serve with whipped topping. Yields about 15 servings.

Thursday, November 11, 2010

Mini Pumpkin Mufins


I woke up this morning and was going to make up cookies, but then realized that I was out of butter/margarine. I had a meeting this morning and wanted to take in a baked treat of some kind, so I had a mini brainstorm and came up with this. You can make these muffins in a regular size muffin tin as well. I'll add those instructions below.

Ingredients:
1 1/2 cups flour
1 tsp. baking soda
15 oz canned pumpkin
1/3 cup vegetable oil
2 eggs
1 tsp pumpkin pie spice(I was out of this, so I mixed a 1/4 tsp each of cinnamon, cloves, ginger, nutmeg and allspice and measured 1 tsp from this)
1 1/4 cup sugar
1/2 tsp baking soda
1/2 tsp salt

In a separate small bowl mix 1 Tbsp sugar and 1 tsp cinnamon to sprinkle on top.

Directions:
Make sure oven rack is in the middle of the oven and preheat to 350 degrees.
In a small mixing bowl stir together flour and baking powder and set aside.
In a larger bowl mix pumpkin, oil, eggs, pumpkin pie spice, sugar, baking soda and salt. Whisk until smooth then add in flour mixture, mixing until just combined.

Spray mini muffin tins with cooking spray and fill each muffin cup one half to two-thirds full. Sprinkle with sugar and cinnamon mixture and bake for 12 minutes.

Let rest in pan for about 5 minutes before removing from pan.
Yields about 45 mini muffins.

For regular 1/2 cup muffin tin you might want to use cupcake liners. Fill each about 3/4 full, sprinkle with cinnamon sugar mixture and bake 25-30 minutes or until a wooden toothpick inserted comes out clean. Let the muffins rest in the pan for at least 5 minutes before removing.

Taco Soup for the Crock Pot


OK, so I posted the recipe for super quick and easy taco soup. Now here is one that is also pretty easy and still pretty quick to throw together. However, you do have to remember to take out hamburger to thaw so that you can brown it for the soup. Ahhh, soup weather! I don't even have to explain to you what soup weather is, because everyone knows. Doesn't matter what part of the country you live in. I can be on the telephone with family or friends who are a thousand miles away and say, "I'm looking out my window right now, and it's perfect soup weather", and I within a millisecond I'll hear "Mmmmmmm" from the person I'm talking to. I have one more taco soup recipe that I will post shortly. For now, here's another keeper!

Ingredients:
1 1/2 lbs. ground beef, browned and drained
1 onion, chopped (you can fry the onion with the hamburger if you want)
1 to 3 cups tomato juice (depends on how soupy you want your soup)
15 oz. can tomato sauce
2 10 3/4 oz. cans cream of potato soup (this may sound weird, trust me, it's GOOD)
10 1/2 oz. can beef broth
2 15 oz. cans kidney beans, drained
1 pkg. taco seasoning mix

Garnish: corn chips, Monterey jack cheese, shredded and sour cream

Combine all ingredients in a 5 quart slow cooker on low for about 6 hours. Makes 6-8 servings.

Sunday, October 24, 2010

Busy Day Taco Soup

My family loves this! It is pretty tasty, but what makes it terrific is that you don't have to thaw anything out ahead of time. Quick, easy and filling! FYI, I always triple this recipe for my own family of 6.

Ingredients:
1 can tomato soup
1 can bean with bacon soup
1 can chili no beans
1 tsp. garlic salt
1 soup can of water


Mix well in soup pot and heat through on medium heat. Serve with shredded cheese, sour cream and Fritos. Add in whatever suits your fancy. Diced green chiles, dried minced onion, sliced black olives, etc...

Tuesday, October 5, 2010

Chili Hotdog Casserole


After several requests by my Facebook friends, I've decided to add this recipe to my blog. I may have already posted this recipe, but I don't feel like scrolling backwards to find out. So here it is folks! In all its glory! Chili HotDog Casserole!! The men in my husband's family hold this dish in the same regard as some do with caviar! By the way, I believe their version of champagne would be Rootbeer! I like this recipe because it's easy and I don't have to thaw out anything ahead of time to make it. Enjoy!

Ingredients:
1 large and 1 reg. sized cans of chili. Dennison's and Nalley's both work well.
1 small onion, chopped
1 pkg. hotdogs, sliced
2 cups shredded monterey jack cheese
1 lg. bag tortilla chips, crushed

Preheat oven to 375 degrees. Spread 1/2 of the crushed tortilla chips on the bottom of a 9 x 13 in. pan/dish. In a large bowl mix chili, onion and hotdogs. Spread evenly over crushed chips in pan. Spread cheese on top of chili mixture. Top with remaining chips and bake for 35 minutes. Serve with salsa and sour cream.

Saturday, July 24, 2010

Lemon Blossoms


This one is a Paula Deen recipe. Nuff Said!!
Ingredients

* 18 1/2-ounce package yellow cake mix
* 3 1/2-ounce package instant lemon pudding mix
* 4 large eggs
* 3/4 cup vegetable oil
*

Glaze:

* 4 cups powdered sugar
* 1/3 cup fresh lemon juice
* 1 lemon, zested
* 3 tablespoons vegetable oil
* 3 tablespoons water

Directions

Preheat the oven to 350 degrees F.

Spray miniature muffin tins with vegetable oil cooking spray. Combine the cake mix, pudding mix, eggs and oil and blend well with an electric mixer until smooth, about 2 minutes. Pour a small amount of batter, filling each muffin tin half way. Bake for 12 minutes. Turn out onto a lint free dish towel

To make the glaze, sift the sugar into a mixing bowl. Add the lemon juice, zest, oil, and 3 tablespoons water. Mix with a spoon until smooth.

Using a fork and your fingers, dip the cupcakes into the glaze while they're still warm, covering as much of the cake as possible, or spoon the glaze over the warm cupcakes, turning them to completely coat. Place on wire racks with waxed paper underneath to catch any drips. Let the glaze set thoroughly, about 1 hour, before storing in containers with tight-fitting lids.

Monday, July 5, 2010

Potato Salad

Potato Salad recipes are like opinions. Everybody's got one! My late mother-in-law used to say, "I've never tasted a potato salad I didn't like!" Either she wasn't as picky as me, or she was extremely lucky! I have tried many potato salads, but have liked only a very few. There have been times when I was in a hurry and needed a potato salad to go with dinner and resorted to buying a tub at the grocery store. Sometimes I can gag it down. Most times, I can't get past the first bite without reaching for my Dr. Pepper (America's Champagne) as a chaser! There are a few rules when it comes to a good potato salad. The potatoes should be tender but not mushy. The salad should be creamy not soupy and definitely not dry. I don't believe in overdoing it with additions either. You can add whatever you prefer to yours. Mine is pretty basic, but tasty as well. Hope you enjoy!

Ingredients & Directions

Wash, peel and cube in to bite size pieces 8 to 10 sm. to med. sized potatoes. In a large pot, barely cover potatoes with water and add 2 tsp. of salt. Bring to a boil and cook until tender. When the potatoes are easily pierced with a fork. Drain into a colander and rinse with cold water. Drain off excess water and put into a lg. salad bowl. While the potatoes are boiling, in another med. to lg. size pot, boil 6 - 8 eggs. Bring to a boil, reduce to a simmer and simmer for 10-12 minutes. Without emptying the hot water out of the pot, fill it with cold water and let sit until the eggs are cool enough to handle.
Shell and chop the eggs, add to salad bowl.
Add 10 or so sweet pickles that have been chopped. Sweet relish is NOT the same!
Add 1/4 cup chopped onion.
In a separate bowl mix, about 1 cup of mayonnaise, 2 tbs. mustard, 2-4 tbs. pickle juice and 1/2 tsp. salt. Mix well and pour over the salad and stir to coat. If it looks a little dry, add more mayonnaise 1 tbs. at a time until you reach a desired consistency. Sprinkle the top of the salad with paprika, cover and refrigerate until ready to serve.

Saturday, July 3, 2010

Pasta Pizza Salad

This is another one that I'll have to post a picture for later. This salad is a meal all by itself and is perfect for hot summer days. It's makes up a big salad bowl full, so invite your neighbors and enjoy a cool, delicious, filling dinner together!

Ingredients & Directions:

16 oz. rotini pasta boiled until tender, drained and rinsed will with cool water.
1 lb. cubed cheddar cheese
1 lb. cubed mozzarella cheese
1 cup diced celery
1 can black olives, drained
1 jar green olives, drained
1 package sliced pepperoni
1 cup parmesan cheese

Mix ingredients together in a large salad bowl and toss. Serve with your favorite salad dressings. Italian, Caesar, Italian, Creamy Parmesan...whatever suits your fancy. The nice thing about this recipe is that you decide on what you want to add. I don't care for tomatoes, so I don't add them. However, I have been known to throw in fresh sliced mushrooms or diced artichoke hearts! Yumm!

Macaroni & Cheese Salad

I'll have to post a picture of this one at another time. This is a recipe of my late Mother-in-law's. Her name was Gloria and she was not just my Mom-in-law. She was one of my dearest friends and I still miss her terribly. She had many talents, including cooking. I am so very thankful I had the opportunity to get to know her before she passed. I have many of her recipes, and this is by far one of my favorites. Even my sister-in-law, who doesn't care for macaroni salads loves this salad! Enjoy

Ingredients & Directions:

16oz. shell macaroni boiled till tender then rinsed cold (I like to use medium sized shells)
1 cup diced celery
1 lb. cubed cheddar cheese

dressing:

4 Tablespoons red wine vinegar
4 teaspoons mustard
2 cups sour cream
2 cups mayonnaise
1 lg. bottle sweet pickle relish
1 tsp. salt (optional)

In a large salad bowl, mix well and refrigerate for several hours or overnight. When you first mix it together, the salad will be rather soupy. This is normal. The pasta absorbs much of the liquid. If you try to cut back on the amount of dressing, the salad will be extremely dry by the next day.

Thursday, June 24, 2010

Buffalo Chicken Mac & Cheese


I decided to combine two of my most favorite foods and hit pay-dirt! Who doesn't love homemade macaroni and cheese? OK, my oldest son doesn't care for it, but still......you can't deny that most people can't pass up a dish of mac & cheese. There's a reason it's known as "comfort food". Then there's buffalo chicken. There hasn't been a single time when I've gone out to eat and ordered buffalo wings or tenders when I didn't end up only wanting more. They're tasty, do doubt! But not the most filling of dishes. For me, the union of these two treats was nothing less than a taste of heaven here on earth!

Directions:
First, you'll want to prepare your chicken tenders to fry up later.
Combine 1/2 cup flour with 1/4 tsp. paprika, 1/4 tsp. cayenne pepper and 1/4 tsp salt in a sm. bowl and mix well.
Cut 10 thawed chicken tender into 1 inch chunks and put in lg. bowl. Pour flour mixture over the chicken chunks and toss to coat. Place coated chicken in a single layer on a cookie sheet and refrigerate for about an hour. This will help the coating to stick to the chicken when frying.
Heat vegetable oil in skillet (just enough to cover the meat) to med-hi heat (375 degrees). Fry chicken for about 10 to 15 minutes, but don't overcook! Place chicken on paper towels to drain.

Mac & Cheese
Ingredients:
16 oz. lg. elbow macaroni
1/2 cup butter
1/2 cup flour
1 tsp. salt
Pinch of black pepper
4 cups milk
4 cups extra sharp cheddar cheese (shredded)
1 cup pepper jack cheese (shredded)

Cook macaroni according to pkg. directions.
In a deep saucepan, melt butter over medium heat. Stir in flour, salt and pepper then slowly add the milk stirring constantly.
Stir in the cheese until melted.
Drain macaroni and add to cheese sauce, gently stirring to coat.
Pour into a 9 x 13 inch pan or dish.
Preheat oven to 375 degrees.

Buffalo Sauce:
Combine 1/4 cup butter 1/2 cup Frank's Red Hot pepper sauce, dash of pepper and a dash of garlic powder in a saucepan and heat until butter is melted and everything is well blended. Add chicken to buffalo sauce and lightly toss to coat.
Pour buffalo chicken and sauce across the top of the mac & cheese and bake @ 375 degrees for 25 minutes. Enjoy!!

The Sweetest!!


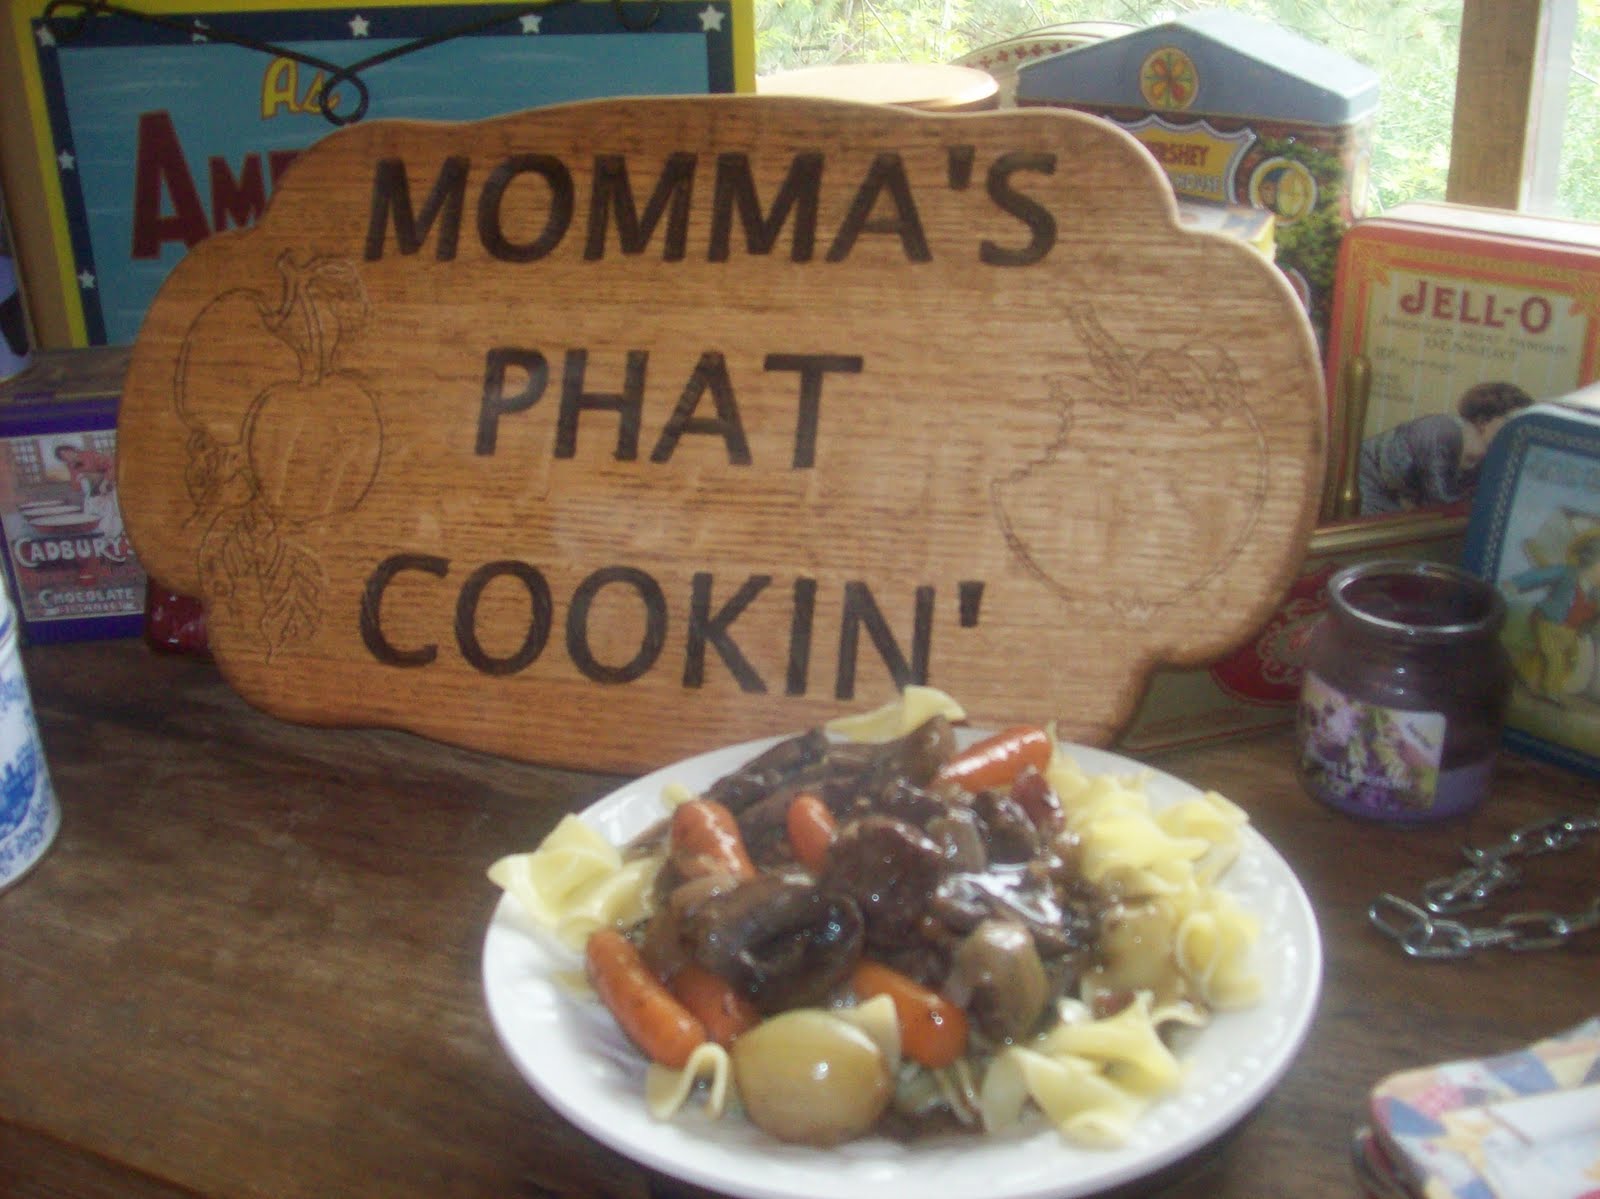
My wonderful, beautiful, smart, talented daughter Aubree made this sign for me in wood shop class. What a lucky mom I am!

Grandma's Rice Pilaf


This is a recipe of my husband's beloved Grandma Kemp. I changed it, but just a little. No disrespect to Grandma, but her recipe calls for 1 lb. of butter. It's no secret that I LOVE, LOVE, LOVE BUTTER!!!! But I found that a full pound in this recipe was a bit too much for this luvah of buttah! I cut it back from 1 lb. to 1/4 of a lb. The recipe calls for long grain rice, but I have been known to use brown rice (as shown in the picture) when I want it to have a bit more texture.This is supposedly a "side dish", but I'm a tellin YOU! This is delicious enough to be a meal all on it's own. Enjoy my friends!!

Ingredients:
1/4 lb as in 1/2 cup as in ONE stick of butter
1 medium onion, chopped
1 tsp. ground oregano
1 cup fresh, sliced mushrooms
2 cups long grain uncooked rice
2 cups water
3 cans beef consomme

Melt butter in a heavy container. I like to use my dutch oven. Add chopped onion and cook until onions are clear. Add the rest of the ingredients and simmer 20 minutes. While this is simmering, you can preheat your oven to 350 degrees. After it has simmered for the 20 minutes, cover and bake in preheated oven for 1 hour.

Friday, June 18, 2010

Maria's Famous Cookies


I got this recipe from my sister-in-law Maria. She doesn't want to take credit for it because she didn't "invent" this recipe. That doesn't matter to me. She's the one who gave me the recipe and she will forever be the person I associate with this cookie. I used butter in place of shortening when I made these just to see if "real" butter would make a difference. It did, but not for the better. They were fine, but a little too close to the crispy side for me. If I'm going to have a home made cookie, then I expect it to be soft. Not crunchy like a cracker. Anyhow, that's just a matter of taste. If you want a more crispy cookie, then use the butter. If you want a cookie that is more like a dessert, then use shortening, at least in THIS recipe. One of the reasons this oatmeal cookie is a hit with me, is because it doesn't call for raisins. Another reason, it has coconut AND chocolate! For those who like raisins, you can add them, if you must!

Ingredients:

1 cup brown sugar
1 cup white sugar
1 cup shortening
1 tsp. vanilla
2 eggs
1 1/2 cups flour
1 tsp. baking soda
1 tsp. salt
2 Tbsp. water
1 cup coconut
3 cups oatmeal
2 cups chocolate chips

Preheat oven at 350 degrees. Mix brown and white sugars with shortening. Add eggs, and vanilla. In a separate bowl, combine dry ingredients together and add to mixture 1/2 cup at a time until well blended. Add chocolate chips and stir. Drop by teaspoon full and bake for 10-12 minutes. Store in airtight container.

Thursday, May 13, 2010

Triple Chocolate Cake!

Sorry folks, no picture with this one. I made it for dessert last night and had every intention of taking a picture before it was devoured, but I was too slow. You'll just have to trust me when I say this cake is DEEE-LISH!!! It always satisfies my chocolate craving and is Big Time moist! What makes it better, is that it's also SUPER easy!!

Directions:

Bake a devils food cake according to directions. However, BEFORE you pour the batter into a 9 x 13 in. pan or dish, stir in 1/2 to 3/4 cup of chocolate chips. Milk or semi-sweet, whichever you prefer. After the cake is done. Let it cool completely and using the handle end of a wooden spoon or dowel about the same size as a pencil, poke holes in the cake about and inch apart in rows that are about 1 to 2 inches apart. Mix a lg. box of chocolate instant pudding according to pkg. directions and the in a very thin stream, pour the pudding over the cake. This way, you'll make sure to fill every hole in the cake with the pudding. Refrigerate until ready to serve.

Tuesday, May 4, 2010

The Only Way To Bake A Potato


OK, so this isn't the ONLY way to bake a potato. But it's definitely MY favorite way! Growing up, my parents would get after me for not eating the skin of the baked potato. "That's where all the vitamins are!" they would say. Or my Dad's favorite, "Eat up! It'll put hair on your chest!" Now I love my parents very much, but they had no clue when it came to convincing me to eat certain foods. Have you EVER heard of a child that was persuaded to eat something because it had VITAMINS? And though I was a little bit of a tomboy at the time. I never have and never will WANT hair on my chest! As I got older, I would eat the skin of a baked potato only because I could hear my Mother saying in my head that I needed the extra vitamins. However, once I learned to prepare baked potatoes THIS WAY, I had truly become a baked potato, skin and all, convert! Hope you enjoy!

Preheat oven to 400 degrees. Scrub potatoes, dry and pierce each one several times with a fork. Rub the potatoes will olive oil (you can use other types, I just prefer olive oil), then roll each potato in coarse sea salt. Wrap each potato in foil and bake for 1 hour or until a knife can be easily inserted through the potato.

Wednesday, April 28, 2010

Sweet Cornbread Pudding


Have you ever had the craving for something but can't for the life of you figure out what IT is? Then you realize what IT is, and you experience the wonderful feeling afterwards of joy, contentment and sweet satisfaction! Now let me ask you this. Have you ever had a craving for something and when you finally figured out what IT is, you have to admit that you've never actually had it before? In fact, you've never even heard of it before! Well this was my predicament. I've always like bread pudding. Except of course when people insist on putting raisins in it. I also like sweet cornbread, but hate that it's so crumbly. I prefer food that doesn't require constant hand eye coordination in order to be eaten. So it came to me one day like someone had flipped on the light for me. WhatI wanted was a bread pudding, but made with sweet cornbread! I searched the internet and found many recipes for cornbread pudding, but none of them were sweet like a dessert. What's the saying? "If it is to be, it is up to me"? So I rolled up my sleeves and made my own recipe. The fact that I am posting it on my blog tells you that the end result was Sweet Success! The way I had to make this, I ended up with a half of a 9 x 13 in. pan of cornbread leftover. Not a problem in my family since they love cornbread. If you can find the Jiffy brand of yellow cake mix, then you can get by with using only 1 box of Jiffy cornbread mix. I had to use a regular size box of yellow cake mix. So this recipe will follow the way I made it. I hope you enjoy this as much as I do.

Ingredients/directions:

6-7 slices of thin sliced french bread that has been left out to dry a bit. Then crumble as fine as you prefer. Set aside and make the cornbread.

2 boxes Jiffy cornbread mix
1 box yellow cake mix
2 eggs
2/3 cup of milk
1 cup of water
1/3 cup of oil

Mix and pour into a 9 x 13 in. greased pan and bake in a preheated oven at 400 degrees for 25-30 minutes. Or until a knife inserted in the center comes out clean. cut in half and place the half you'll be using in the pudding on a cookie sheet, crumbling as you do so. This will help it to cool much faster.

Heat oven to 350 degrees. When cornbread crumbs are cool, add to dried bread crumbs in a large mixing bowl. To this, you will add:

4 eggs
3 cups half and half
1 tsp. vanilla
1 cup drained fruit cocktail

Mix well and pour into a greased (sprayed with Pam) 9 x 13 in. pan and bake for 35-40 minutes or until a knife inserted in center comes out clean.

Glaze:

1/2 cup powdered sugar
1/4 cup honey
add just enough milk to make a thick glaze
zest of one lemon

Cut pudding into squares and serve warm with glaze

*Note: If you want it extra sweet, then add in 1/3 cup of sugar.

Saturday, April 24, 2010

Carnitas and Roasted Tomatillo Sauce


While we lived in California, I got plumb spoiled with authentic Mexican food. Up until then, I didn't think I would ever like it. The extent of Mexican cuisine for me was the occasional trip to the Taco Bell drive thru. However it didn't take me long after moving to Cali to give it a try and I fell in love! Homemade tamales, carne asada and carnitas! There are a few Mexican restaurants here in Missoula, MT. I've been to one of them so far. Unfortunately, my experience was "eh, ok I guess". So I tried my hand at making carnitas myself. Some people roast the pork, but I read that for "authentic" carnitas, the pork should be deep fried in lard. It actually came out really yummy and not greasy at all. I was shocked! The only downside is that because you're frying, you have to stay close by the stove at all times. I think next time I'll roast it in the crock pot and see how it turns out. By the way, if you're going to make carnitas, then you MUST make roasted tomatillo sauce to go with it. The recipe I use is easy and SO delicious and fresh tasting! Enjoy!

Tomatillo Sauce/Salsa AKA “Green Sauce”

Ingredients

  • 1 pound fresh tomatillos, husks removed
  • 1 head garlic cloves, separated and peeled
  • 2 to 3 fresh jalapeno peppers
  • 1 bunch fresh cilantro
  • 1/2 cup water, or as needed
  • salt and pepper to taste

Directions

  1. Preheat the oven's broiler. Arrange the whole cloves of garlic, tomatillos, and jalapenos on a baking sheet. Place under the broiler, and cook for a few minutes. Remove garlic cloves first, as soon as they are toasted, you don't want them to have a bitter flavor. Continue to roast jalapenos and tomatillos until evenly charred, turning occasionally. Set aside to cool. Don't remove the charred parts of the tomatillos or the peppers. They add a really nice flavor.
  2. Place peppers and tomatillos in a blender with the garlic and cilantro. Add a little water to the mixture if necessary to facilitate blending (I didn't need to add any water). Season with salt and pepper to taste. Refrigerate until serving.


Carnitas

  • 1/4 cup fresh lime juice
  • 1/2 tablespoon salt
  • 2 1/2 pounds boneless pork shoulder
  • 2 pounds lard
  • 2 dozen corn tortillas
  • salt

Slice the pork into 3 inch slabs. Make sure they all end up roughly the same size, so they cook in the same amount of time.

Toss the pork into a large bowl and then add the lime juice and salt. Stir the pieces until well coated. Cover the bowl and refrigerate for an hour. Toss the pieces twice over the course of the hour.

Meanwhile, melt the lard in a large pot over medium heat.

When the hour is up, carefully add the pork to the pot. The lard should cover the pieces. After a few minutes, very large and lazy bubbles will pop to the surface. This is good. You don't want to have aggressive frying. Let cook on medium, flipping the pieces occasionally for even cooking, for about 2 hours or until cooked through. The meat should be very tender when pierced with a fork.

The meat should come out all nicely browned and golden.

Set them on a cutting board and let sit for 10 minutes or so.

Meanwhile, fill the bottom of another pot with about a 1/2 inch of water and bring to a boil. Wrap the tortillas in a towel and set in a steamer basket atop the boiling water. Cover the pot.

Cook for 1 minute. Then turn off the heat and let sit for 15 minutes or so.

Now it's time to get the meat ready. Slice it or shred it. Whichever you prefer.


Tuesday, April 20, 2010

Tangy BBQ Pork


I love, I mean LOVE barbecue! I don't mean cooking out on the grill. I'm talking about barbecue sauce, and not the kind out of the jar either. This recipe isn't the typical BBQ sauce. Thick and sweet with molasses and brown sugar. This particular sauce is tangy and definitely has a little bit of a bite to it. Not hot and spicy mind you. Just enough of spice to get your attention and SATISFY! Being a daughter of the South, I prefer my sandwich topped off with a bit of coleslaw. Now all I need is a tall glass of lemonade!

Ingredients & Directions:

1 2 to 3 lb. pork shoulder roast
Make a rub of 2 tsp. garlic powder, 2 tsp. Lawry's season salt and 1 tsp. pepper. Rub this mixture all over the roast and place in a crock pot with 1 bay leaf and cook on low for about 8 or 9 hours. When the meat is tender. Turn off the crock pot and begin to make your sauce.

Sauce:

1/2 c. water
1/4 cider vinegar
1/4 c. butter or margarine
2 tbs. sugar
2 tbs. Worcestershire sauce
1 tbs. mustard (the condiment, NOT dry)
1 1/2 tsp. salt
1/2 tsp black pepper
1/4 tsp. crushed red pepper
1 thick slice of lemon
1 thick slice of onion
1/2 c. ketchup

Mix all of the ingredients except for the ketchup in a medium saucepan. Bring to a boil, stirring frequently. Reduce heat and simmer partially covered for 20 minutes. While the sauce is simmering, remove the roast from the crock pot and shred the meat really well. After the sauce has simmered for 20 min. remove from heat, discard lemon and onion and stir in ketchup. If the pot is big enough, add the shredded pork to the sauce and stir well to coat. If not, I'm sure you're smart enough to look for something that will work. ENJOY!!

Sunday, April 18, 2010

French Vanilla Walnut Cookies

My daughter's friend told me these were "Heaven In A Cookie!" Let's think about this. Light, soft, warm and sweet. Sounds like Heaven to me! This is one of the many, and I mean MANY variations on the "Cake Mix Cookie". If you don't care for nuts, then just leave them out. They're still good; just not AS good.

Ingredients:

1 French Vanilla cake mix
1 egg beaten
1 stick melted butter or margarine
1/4 to 1/3 chopped walnuts
ground cinnamon

Directions:

Preheat oven to 375 degrees. Mix all ingredients except for the cinnamon well. Make sure the melted butter isn't too hot. Otherwise it will cook your egg while mixing. I like scrambled eggs, but not in my cookies! You can mix this by hand, but I prefer to use my KitchenAid as I feel it gives me a better consistency of dough. Roll into balls, about the size of a small walnut and place on an ungreased cookie sheet. Give each one a little tap to flatten out the top a little and sprinkle with cinnamon. Bake for 8 to 11 minutes, depending on your oven. Cool slightly and enjoy your own piece of "Heaven".

Marinated Bean Salad

Yeah I know, ANOTHER bean salad recipe! If I didn't get so many compliments on my bean salad, I wouldn't bother to even put this one up. But I DO get compliments at every picnic, potluck, etc... I take it to. AND I must admit that I also prefer my bean salad to anyone else's. Bean salads out of a can, out of a jar or even from the local deli doesn't hold a candle to this one! The best thing about this bean salad, as with all others I suppose, is that the longer it's able to sit in the fridge and marinate, the BETTER! Bean salad that has sweet PLUS tang! YESSS!

Ingredients & Directions
1 can cut green beans, drained
1 can cut wax beans, drained
1 can dark red kidney beans, drained
1 can garbanzo beans, drained
1 sm. red onion, cut into rings or diced
1 sm, green bell pepper, diced

Mix into medium sized salad bowl and make dressing as follows:

1/2 cup red wine vinegar
3/4 cup sugar
1/2 cup vegetable oil
1 tsp. salt
1/2 tsp. cracked black pepper

Pour dressing over salad, tossing to coat well. Cover and refrigerate overnight or at least 8 hours. When ready to serve, pour off dressing but don't throw it out. You'll want to keep it to put the leftovers into before you put it back in the fridge.

Tuesday, March 30, 2010

Not Your Typical Broccoli Cheese Soup


When most people think of broccoli cheese soup, they imagine a bowl of broccoli pieces swimming in a thin cheddar cheese sauce. I'm not knocking other recipes. I have tried many variations and they have ALL been mighty tasty in my opinion. However, THIS one will grab your taste buds, slap them around and say "Wake Up!" You are in for A treat! My husband HATES broccoli and....well just about ANY green vegetable there is. But I make THIS soup? He is more than happy to be the good example to his kids and eat ALL of his veggies!

Ingredients:

1 16 oz. bag of frozen broccoli
1 16 oz. bag of frozen cauliflower
1 heaping cup of long grain rice
6 cans of Swanson chicken broth
8 oz. cream cheese
1 cup parmesan cheese
1 pint of half and half
1 1/2 tsp. garlic powder (or according to taste)
1 1/2 tsp salt (or according to taste)

Directions:

In a large pot, put in broccoli, cauliflower, rice and chicken broth. Heat over medium high heat until mixture comes to a boil. Reduce heat and boil gently until the mixture has absorbed most of the broth. Remove from heat and using a potato masher, mash the mixture until mushy! Place back on heat reducing the temp to simmer and add in the remaining ingredients, stirring to mix well and making sure that the cream cheese has completely melted into the soup. If the soup is too thick just thin it down with some milk. This soup is especially good with Chicken in a Biscuit Crackers!

Chicken Pillows

This is my daughter Aubree's absolute most favorite dinner and is what she asks me to make every year for her birthday. I must admit that I enjoy them very much as well. Just the name alone makes people say "OOOHH, that sounds GOOOD!" It's a little time consuming by the standards of some people out there, but once you taste them you'll understand why they are worth the extra time.

Ingredients:

6 boneless, skinless chicken breasts that have been boiled and either cubed or shredded.
2 tbs. softened butter or margarine
12 to 16 oz. of softened cream cheese (depending on how much you like cream cheese!)
dash of pepper
2 cans of refrigerator crescent rolls
1 stick melted butter or margarine
1 box of dry Stove Top Stuffing w/seasoning that has been pulverized in the blender until you have fine crumbs.


1 can of cream of chicken soup
1/2 soup can of milk

Directions:

Preheat oven to 350 degrees. Mix prepared chicken with cream cheese, butter and pepper, stirring to mix well. Roll out crescent rolls and place an equal amount of chicken mixture in each crescent roll. Then one at a time, roll up each filled crescent roll, making sure to pull up and pinch the sides to hold in the mixture. Dip in melted butter and roll in seasoned bread crumbs. When you have all of the rolls done, place on an ungreased cookied sheet and bake for about 25 to 28 minutes.

In a medium sized saucepan mix the cream of chicken soup with milk and heat over medium low heat until heated through. This sauce is to go over the chicken pillows once they're on your plate. I always triple the sauce recipe and also use it as a gravy to go over rice.

Porcupine Meatballs

I like these because they have kind of meatloaf texture and flavor. The nice part is that they are easier to serve because you don't have to deal with slicing it like you do meatloaf. I serve them over rice using the sauce as the gravy.

Ingredients:

1 1/2 lbs. of hamburger
2/3 cup long grain rice
1/2 cup water
1/4 cup chopped onion (optional)
1 tsp. Lawry's season salt
1/4 tsp. garlic powder
1/8-1/4 tsp. pepper
1 15 oz. can tomato soup
2 tsp. worcestershire sauce
1 cup water

Directions:

Preheat oven to 350 degrees. Mix hamburger with rice, 1/2 cup of water, (chopped onion), season salt, garlic powder, and pepper. Form meat mixture into 1 1/2-inch balls. Place the porcupine meatballs in an ungreased 2-quart shallow baking dish. Mix the remaining ingredients and pour over the porcupine meatballs. Cover with lid or foil and bake at 350° F. oven for about 45 minutes. Uncover and bake porcupine meatballs 15 minutes longer.

Dutch Oven Potatoes


This recipe begins with a pound of bacon! How can that NOT bring a smile to your face? I never have the time to cook with my dutch oven on hot coals outside, so I just put my dutch oven inside my regular oven. Dutch oven purists may look down upon me, but I have never had any complaints from my family or friends when I serve this one up!

Ingredients:
1 lb. of bacon diced
1 lg. onion sliced
6 or 8 potatoes (depending on size) sliced
1 cup sliced or shredded carrots
salt and pepper to taste

Directions:

Preheat oven to 375 degrees. Heat your dutch oven on top of the stove and fry bacon and onions till bacon is cooked and onions are clear. Stir often so as not to stick. Remove from heat and add in remaining ingredients, stirring to coat well. Bake for 35 minutes or until potatoes and carrots are tender.

Now I've never tried it myself, but I've heard that sliced mushroom added to this dish is pretty tasty!

Friday, February 26, 2010

Thoughtless Popovers


This is hardly a "recipe" because it's so darn easy. But they're also pretty tasty too, which is why it merits posting on my blog.

Ingredients:
1 can refrigerator biscuits
Strawberry jam or whatever flavor you care for.
Spray margarine and cinnamon

Preheat oven to 400 degrees. Flatten biscuits with a rolling pin and place on cookie sheet. Put a teaspoon of jam on each biscuit. Fold over and pinch to seal. Spray with margarine and sprinkle with cinnamon. Bake for 10 minutes. By the way, I'm thinking this would be really yummy with cream cheese and blueberries! What do you think?

Wednesday, February 17, 2010

Chocolate Chip Cookie Cheesecake Dessert


This is another recipe I got from my good friend BJ. This one is a keeper for sure! How can you NOT love a dessert that has BOTH chocolate chip cookie dough AND cheesecake! God bless the people who came up with cream cheese and sour cream. Any time I see a recipe with either of these ingredients listed, it gets my attention right away! This recipe will make a big 9 X 13 inch dish and is very rich. For those who cannot handle such decadence, I suggest you cut the recipe in half and bake it in a 9 X 9 inch square pan. Now why do we always add the word square after saying 9 X 9 or 8 X 8 inch pan? I think most of us (even those of us who went to Rancho High School!LOL) are bright enough to figure out that if ALL the sides are equal, that it IS a square! Ah well. Enough blabbing for now. Here's the recipe!

Ingredients:

2 rolls of chocolate chip cookie dough
1 cup sugar
(2) 8 oz. pkgs. Of cream cheese, softened
1 egg

Preheat oven to 350 degrees. Blend cream cheese, sugar and egg. Take one pkg of cookie dough, cut into slices and cover bottom of a lightly greased 9 X 13 in. pan. Top with cream cheese mixture. Slice other pkg. of dough and arrange on top of cream cheese mixture. Bake at 350 degrees for 30 minutes. Cool and refrigerate.

Parmesan Ranch Biscuits


I think we ALL can agree that the generic refrigerator biscuits are rather lame. And by lame, I mean TASTELESS! For me, generic refrigerator biscuits are like zucchini. They're only tasty if you tweak it a bit. As far as I'm concerned, the only thing zucchini is good for is zucchini bread! Anyhow, since we are ALWAYS on a tight budget, AND those tasteless refrigerator biscuits regularly go on sale for super cheap! I've learned a way to may them yummy enough for my family to oohh and aahh over them when I put them on the table.

Preheat your oven to temp. listed on the can of biscuits. Pour ranch dressing into a small bowl and do the same with parmesan cheese. Dip the top of each biscuit in the ranch dressing and then coat that same side with the parmesan cheese. Bake as directed. Sometimes I'll flatten out the biscuit dough with my palm before dipping them in ranch and parmesan cheese, and then fold them over. It doesn't make them taste any different. It just makes your family THINK they're getting something different!

Saturday, February 6, 2010

Simple Blueberry Cobbler

Here's another recipe requested by my sis in law Maria. This one is really fun to make in a dutch oven!

Ingredients:

1 can blueberry pie filling OR 2 cups blueberries with 1/3 cup sugar sprinkled on top.
1 yellow cake mix
1 can lemon lime soda
ground cinnamon

Preheat oven to 350 or 375. It depends on your oven. In a 9 X 13 inch dish pour in blueberry pie filling. If you're using fresh blueberries, then rinse them letting as much of the water drip off as you can. Put into bottom of dish and sprinkle with the sugar. Mix 1 yellow cake mix with 1 can lemon lime soda. You don't need a mixer for this. I just stir it in by hand. Pour on top of blueberries making sure to cover. Sprinkle with cinnamon and bake for 30 to 35 minutes.

Tropical Cake

This is another one of those easy AND yummy recipes! My sister in law Maria requested that I post this for her. Sorry, no photo go with it yet. I was on the phone with her explaining what goes into it while in line at the bank. After I hung up, the teller one window over asked me for the recipe! Too funny! Anyhow, here it is Maria!

Preheat oven to temp. printed on the cake mix. Mix 1 yellow cake mix according to directions. Fold in 1 sm. can of drained mandarin oranges and bake as directed in a 9 X 13 inch pan. Cool completely. For frosting, mix 1 eight oz. container of cool whip with 1 sm. box instant vanilla and 1 sm. can of drained crushed pineapple. Spread on cake. Keep in refrigerator. This cake is super moist!

Monday, February 1, 2010

SALSA!!!


I don't know where this recipe originated. My friends and family call it "Becky's Salsa" just because I'M the one who makes it. I call it "Peggy's Salsa" because that's who I got it from. Peggy calls it "Sandra's Salsa" and so on and so on. I once went to a craft/bake sale where this salsa was being sold. I tasted it and exclaimed, "Hey! This is the same salsa that I make!" The lady was none too happy about it. She assured me that while she had gotten the recipe from someone else, that she had CHANGED it. So that meant that the recipe was now hers! I thought, "Gimme A Break!" Recipes are to be shared and EVERY recipe is just a modification of a previous one. The POINT is.....this salsa is WAY yummy and makes about a half gallon. That may seem like a lot, but I've never had to throw any away either. Enjoy and feel free to call it Becky's or Peggy's or Sandra's or YOUR salsa! Just make sure you keep your mood light! Life is meant to be enjoyed and you can't do that if you're hung up on who got credit for THE recipe!

Ingredients:
2 28 oz. cans of whole tomatoes
5 jalapenos ends cut off, sliced and seeds removed (leave the seeds from 1/2 jalapeno if you want a little more kick!)
2 tsp. of chicken bouillon granules or 4 chicken bouillon cubes
1 tsp. salt
3 cloves of garlic
2 ripe avocados
1 medium diced onion
1 bunch chopped fresh cilantro
1 rounded (heaping) tsp. ground cumin

Put 1 can of tomatoes, jalapenos, bouillon, salt and garlic in blender and chop or blend for about 10 seconds. If you're using the bouillon cubes, you'll want to run the blender a little longer unless you smash the cubes ahead of time. Pour into large bowl. Put 2nd can of tomatoes in blender and blend for about 5 seconds. Add 1 avocado and blend for about 5 to 10 more seconds. Add to salsa bowl. Dice second avocado and add to salsa along with the remaining ingredients. Serve! Note: You can keep this salsa in your fridge for a couple of days. Remember, the longer it sits the hotter your salsa will be!

Sunday, January 31, 2010

Easy Spaghetti Sauce


This is a slightly changed family recipe. For one thing, the original recipe calls for lard to be added to the meat. Yes, you read that right. LARD! I have tweaked it here and there over the years to better match my taste. I CAN tell you that when I tell my family I'm making spaghetti with homemade sauce that I'm a hero! I once made this for company and one of the guests enjoyed it so much, that he wanted to drink the leftover sauce from his plate. Others at the dinner table got after him for "manners", but I was tickled that he enjoyed it so!

Ingredients:
1 lb. hamburger or Italian sausage
1 sm. chopped onion
2 lg. cans tomato sauce
1 lg. can tomato paste
1/2 to 1 cup water
1 tsp. minced garlic
1 tsp. thyme
1 tsp. chili powder
1 tbs. salt
2 tbs. sugar
1/2 tsp. pepper
1/8 to 1/4 tsp. allspice
1 bay leaf
2 tbs. dried parsley

Brown meat with chopped onion and drain. Put into a deep sauce pan and add remaining ingredients, stirring to blend well. Heat over medium low heat until it starts to bubble. Cover, reduce heat to low and simmer at least 40 minutes stirring occasionally. Remove bay leaf and serve.

Tuesday, January 26, 2010

SAUCY MEATBALLS


This is a terrific appetizer/snack/party food! This recipe is easy and delicious! Two things I absolutely love! The ingredients may make you go, huh? But trust me when I tell you that this is way big time yummy. And when people compliment you on it, it's fun to watch their faces when you tell them the ingredients! LOL

Ingredients:
Frozen meatballs (1 bag, 2 bags, or whatever your crockpot will hold)
equal parts chili sauce and grape jelly.

Place the frozen meatballs in the crockpot. Pour the chili sauce (you can find this in the condiments section of your grocery store. Usually next to the cocktail sauce) and the grape jelly over the meatballs and stir to coat. Cook on low for several hours until the meatballs are heated through and serve.

Lemon Bars


My longtime and best friend BJ gave me this recipe and I thank her for it EVERY single time I make it! Even if you are a committed chocoholic and cringe at the thought of a dessert that is NOT chocolate, you will LOVE this one! I'm telling you! I have never taken this dessert to a party, meeting or whatever where someone has not asked for this recipe and then given me a hug once I deliver it. The crust alone is heavenly! Then you add the lemon filling on top of that and then frost it with the homemade cream cheese frosting! I'm telling you! I am drooling just thinking about it. It is THAT good! So thank you again BJ for sharing this recipe with me!

Ingredients:

1 cup softened butter
2 cups flour
½ c. powdered sugar
Mix these together and press into an ungreased 9x13 pan or dish and bake at 350 for about 10-12 minutes.

Filling
Mix 4 eggs, 2 cups granulated sugar, ½ cup flour and 6 tablespoons of lemon juice. Pour over warm crust. Bake at 350 for 20 minutes. Frost when cool.

Frosting
6 oz. softened cream cheese
3 tablespoons melted butter
2 cups powdered sugar
1 tsp. vanilla
Mix well, till no lumps, spread over lemon bars.

Chicken Bog


For those who don't know what Chicken Bog is, it is chicken bogged down in rice. Get it? Paula Deen among others add in sausage and peppers and such. As for me? When it comes to Chicken Bog, I am a purist! Don't go gettin all fancy on me with this dish. The blended flavors of the chicken, rice, salt and pepper to me, are perfect just as they are. Chicken Bog with a side of homemade biscuits and I am SO there!

Ingredients:
1 whole chicken (3 to 4 lbs is what I usually use)
8 cups water (a little more or less depending on the size of your chicken and how much rice you want to cook with it.
4 cups long grain rice (does not HAVE to be long grain. Medium is fine also. Just follow the directions on the package as you might need to adjust the amount of water to it in)
2 tsp. salt
1/2 tsp pepper

Directions:
Rinse your chicken and pull out the neck, heart, etc. Some people keep these and cook them up. I don't.:)
Place the chicken in a large stock pot. Add water, salt, pepper and bring to a boil. Turn down heat and let it gently boil for about an hour or until the meat easily comes off the bone using a fork.
Remove the chicken and set aside to let it cool down a bit.
Add rice to the broth and cook as directed on the package.
After rice is done. (I like to cook mine until it's sticky because I hate to have grains of rice fall through my fork!) De-bone the chicken and add to rice. Stir and serve! This is not particularly salty. I do this because everyone's salt preference is different.

Sunday, January 17, 2010

Texas Sheet Cake


I love this cake! It's a moist chocolate cake, but no thicker than a brownie. That way, you don't feel near so guilty if you sneak back into the kitchen for an extra slice! This cake travels well and is a great dessert to take for a big family picnic. Now for ME, I love nuts! However, there are some members of my family who don't. So when I make the frosting, I don't add the nuts. Instead, I sprinkle the nuts on half of the cake and pour the frosting over.

Cake Ingredients:
2 cups flour
2 cups sugar
1 stick butter
1/2 cup oil
1 cup water
4 tbs. cocoa
2 eggs
1 tsp. cinnamon
1 tsp. vanilla
1 tsp. baking soda
1/2 cup buttermilk (yes, the fake kind where you add a little vinegar to regular milk works well too)

Preheat oven to 350 degrees. Mix flour and sugar in a mixing bowl. In a med. size pot, bring butter, oil, water and cocoa to a boil. Pour over the flour mixture and blend well. I like to use my Kitchen Aid for this. Stir in eggs, cinnamon, vanilla, baking soda and buttermilk and blend well. Pour batter onto an ungreased cookie sheet WITH A RIM. Bake for 20 minutes or until done. 5 minutes before you take the cake out of the oven, start making the frosting.

Frosting Ingredients:
1 stick butter or margarine
4 tbs. cocoa
6 tbs. milk
1 lb. powdered sugar
1 tsp. vanilla
1/2 cup chopped walnuts, if desired

Combine butter, cocoa and milk in a sm. pot and bring to a boil, stirring so as not to stick. Combine the rest of the ingredients and mix well adding nuts. Pour over cake and spread to cover. Let cool, slice and serve.

Crock Pot Pork Chops and Stuffing


It might not look like much, but this is one of my family's all time favorites! It's easy, filling and most importantly, DELICIOUS.

Ingredients:
2 boxes of Stove Top Stuffing, cooked according to directions on the box.(It does not matter which flavor you use. When I cooked it this last time, I used one cornbread and one turkey mix and cooked them together. Yum Yum!)
1 can cream of mushroom soup
1/4 cup milk
6 pork chops (1/2 inch thick)


Make stuffing and set aside. Heat about a 1/2 inch of oil in a frying pan. Salt and pepper pork chops. Dredge in flour and fry for about 4 or 5 minutes on each side. Place pork chops in the bottom of the crock pot. Mix cream of mushroom soup with milk and pour over pork chops. Top with stuffing and cook on low for 4 hour or until tender.

Be careful when serving, because the meat will fall off the bone and the bones can hide a little too well in the stuffing. Unless of course you use boneless pork chops. If so, then no worries!

Stove Top Mac and Cheese


This recipe is pretty easy and SO much better than anything out of a box. So cheesy and creamy! I believe THIS is where the term "comfort food" got it's start. It feels like a hug from the inside.

Ingredients:
7 oz. of elbow macaroni
1/4 cup butter or margarine
1/4 cup flour
1 tsp. salt
1 dash of black pepper
1 dash of white pepper
2 cups milk
1 1/2 cups of shredded cheddar cheese
1/4 cup of shredded pepper-jack cheese

Cook macaroni according to package directions. Meanwhile, in a medium saucepan, melt butter over medium heat. Stir in flour, salt and pepper, mixing well. Gradually add milk; cook and stir until thickened. Stir in cheese until melted. Drain macaroni and add to cheese sauce. Stir till it's well coated and serve.

Friday, January 15, 2010

LASAGNA!!


For the longest time, my oldest son would only eat the sausage out of the lasagna! I'm so glad that my son the carnivore has come around! I'm not too picky, but I have to admit that veggie lasagna holds no charm for me. If you're gonna omit meat, that's fine. But don't throw in vegetables and tell me "it's just like meat". Nope! As Jiminy Cricket says, "I'm No Fool! No Siree!" So don't try and pull one over on me when it comes to food!

Ingredients:
1 lb.ground mild or sweet Italian sausage
1 tsp.dried minced onion
1 tsp. minced garlic
1 (14.5 oz) can stewed tomatoes (I run this in the blender a few seconds just because I don't care for chunks of tomato)
1 (12 oz) can tomato paste
1 (8 oz.) can tomato sauce
2 tbs. Italian seasoning
2 tsp. sugar
1 tsp. salt
1/2 tsp. chili powder (I once used chipotle chili powder and that was good too!)
12 lasagna noodles cooked till tender
2 cups cottage cheese
1/2 cup of parmesean cheese plus a little more to sprinkle on top
1 tbs. dried chopped parsley
1 tsp. salt
1/2 tsp black pepper
1/4 tsp. season salt
16 oz. shredded mozzarella

Directions:
Preheat oven to 375 degrees. Spray the bottom of a 9 X 13 inch casserole dish lightly with Pam.

In a large pan, over medium heat, brown sausage (if you can only find the links, then just slice and remove the skins). Make sure you break up the meat with a spoon really well. Drain off grease if there is any. Add stewed tomatoes, tomato sauce, tomato paste, onion, garlic, salt, sugar, chili powder and Italian seasoning. Stir well. If it looks too thick, just add a little water. No more than 1/4 cup though! Cover and simmer 20 minutes, stirring occasionally.

In a large bowl, whisk the eggs and add in cottage cheese, 1/2 cup parmesean cheese, season salt, pepper and parsley and stir.

Place one layer of 4 noodles in the bottom of the casserole dish, overlapping about 1/2 inch. Spread 1/3 of cottage cheese mixture over pasta. Sprinkle 1/3 of the mozzarella on top and then spread 1/3 of the sauce over the mozzarella. Repeat this and sprinkle a little more mozzarella on top along with a little more parmesean cheese. Cover with foil and bake for 20 minutes. Then remove the foil and bake for another 20 minutes. Let stand for at least 10 minutes before serving.

Chicken and Dumplings

I'm posting this recipe again, because I now have a picture to go with it.


Down south, it's called chicken and pastry. Out west, it's chicken and dumplings. Either way, it is delicious IF prepared correctly. Dumplings should never be too heavy.

Ingredients:

1 2-3lb. whole chicken
6 cups water
1 tbs. salt
1/2 tsp. pepper
1 cup milk
2 tbs. margarine
1/3 cup shortening
2 cups sifted self-rising flour
1/2 cup water

Place chicken in a big enough pot and add 6 cups of water, salt and pepper. Bring to a boil, cover, reduce heat and simmer 45 minutes to 1 hour or until very tender. Remove chicken from broth; let cool. Remove chicken from bones and dice or shred. Add milk and margarine to broth; bring to a simmer.

Cut shortening into flour using a pastry blender until mixture resembles course meal. Add 1/2 cup water and stir with a fork just until dough leaves side of bowl. If it's too dry, then add a little more water a tsp. at a time. For rolled dumplings, which I prefer, roll out dough to 1/8-inch thickness on a lightly floured surface; cut into 2 inch squares. For drop dumplings, pat dough to 1/2-inch thickness on a lightly floured surface; pinch off dough in 1 1/2-inch pieces. Gradually drop dumplings, one at a time, into boiling broth mixture. Cover, reduce heat, and boil gently for 15 minutes, or until dumplings are cooked. Stir occasionally to prevent sticking. Stir in chicken and heat through.

Monday, January 11, 2010

Sour Cream Green Enchilada Casserole


This recipe makes a big pan! If you have enough side dishes, you can get 2 meals out of it. It also takes a little bit of muscle to stir all of the ingredients together! I don't mind it though. It helps me to justify eating such a cheesy dish! This a recipe of my Grandma York's, who got it from her daughter, my Aunt Debbie.

Ingredients:

24 corn tortillas cut into square chunks
1 can of diced green chilies. I like to use a lg. can because I love the flavor!
2 cans of cream of chicken soup
1 24 oz. container of sour cream
1 sm. diced onion or 2 tbs. of dried minced onion
2 cups of shredded cheese plus a little more to put on top.

Preheat oven to 375 degrees. In a large mixing bowl coe, 1 medium onion diced, green chilies, cream of chicken soup, sour cream and corn tortillas. Mix all together, put in a 9 X 13 inch casserole dish top with cheese. Bake 30 minutes.

Thursday, January 7, 2010

Simply Delicious Strawberry Cake!


This is a Paula Deen recipe, so you KNOW it's good!! When I made this, I couldn't find any strawberry extract. I used raspberry extract instead and it tasted great! This cake is really moist and the frosting rich. So make sure you drink a Diet Coke with it to balance it out! As for me? I CAN'T do the diet soda thing! I can gag down some Crystal Light lemonade. But my #1 diet drink of all time is WATER!! It's refreshing, calorie free, and unless you insist on bottled water, it CAN be absolutely free!! Proof once again that our God IS and Awesome God!

Ingredients

* 1 (18.25-ounce) box white cake mix
* 1 (3-ounce) box strawberry-flavored instant gelatin
* 1 (15-ounce) package frozen strawberries in syrup, thawed and pureed
* 4 large eggs
* 1/2 cup vegetable oil
* 1/4 cup water
* Strawberry cream cheese frosting, recipe follows
* Strawberry Cream Cheese Frosting
* 1/4 cup butter, softened
* 1 (8-ounce) package cream cheese, softened
* 1 (10-ounce) package frozen strawberries in syrup, thawed and pureed
* 1/2 teaspoon strawberry extract
* 7 cups confectioners' sugar
* Freshly sliced strawberries, for garnish, optional

Directions

Preheat oven to 350 degrees F. Lightly grease 2 (9-inch) round cake pans.

In a large bowl, combine cake mix and gelatin. Add pureed strawberries, eggs, oil, and water; beat at medium speed with an electric mixer until smooth. Pour into prepared pans, and bake for 20 minutes, or until a wooden pick inserted in the center comes out clean.

Let cool in pans for 10 minutes. Remove from pans, and cool completely on wire racks.
For the frosting:

In a large bowl, beat butter and cream cheese at medium speed with an electric mixer until creamy. Beat in 1/4 cup of the strawberry puree and the vanilla extract. (The rest of the puree is leftover but can be used in smoothies or on ice cream for a delicious treat.) Gradually add confectioners' sugar, beating until smooth.

Spread frosting in between layers and on top and sides of cake. Garnish with sliced fresh strawberries, if desired.